 Skip to content
FOR CLINICIANS AND PHYSIOTHERAPISTS
Distal radius fracture fixation — volar locking plate
Protection, movement and a gradual return to daily activity. Select the stage appropriate to the actual procedure and current clearance.
Using and loading the limb
Initially avoid forceful grip, lifting and support. Wrist resistance, for example 0.5 kg, requires individual clearance and healing assessment.
Full guidance ↓Brace or immobilisation
Use the prescribed wrist orthosis; stable plating does not automatically require 6 weeks of rigid immobilisation. Additional repairs may prolong protection.
Full guidance ↓Permitted movement
Finger motion starts early; wrist motion and rotation follow clearance. With TFCC/DRUJ injury, do not assume unrestricted forearm rotation.
Full guidance ↓Permitted movement, loading and removal of a brace are separate decisions. Additional repairs may require a more protective programme.
Rehabilitation at a glance
Progression follows healing and functional criteria, not dates alone.
Rehabilitation boards

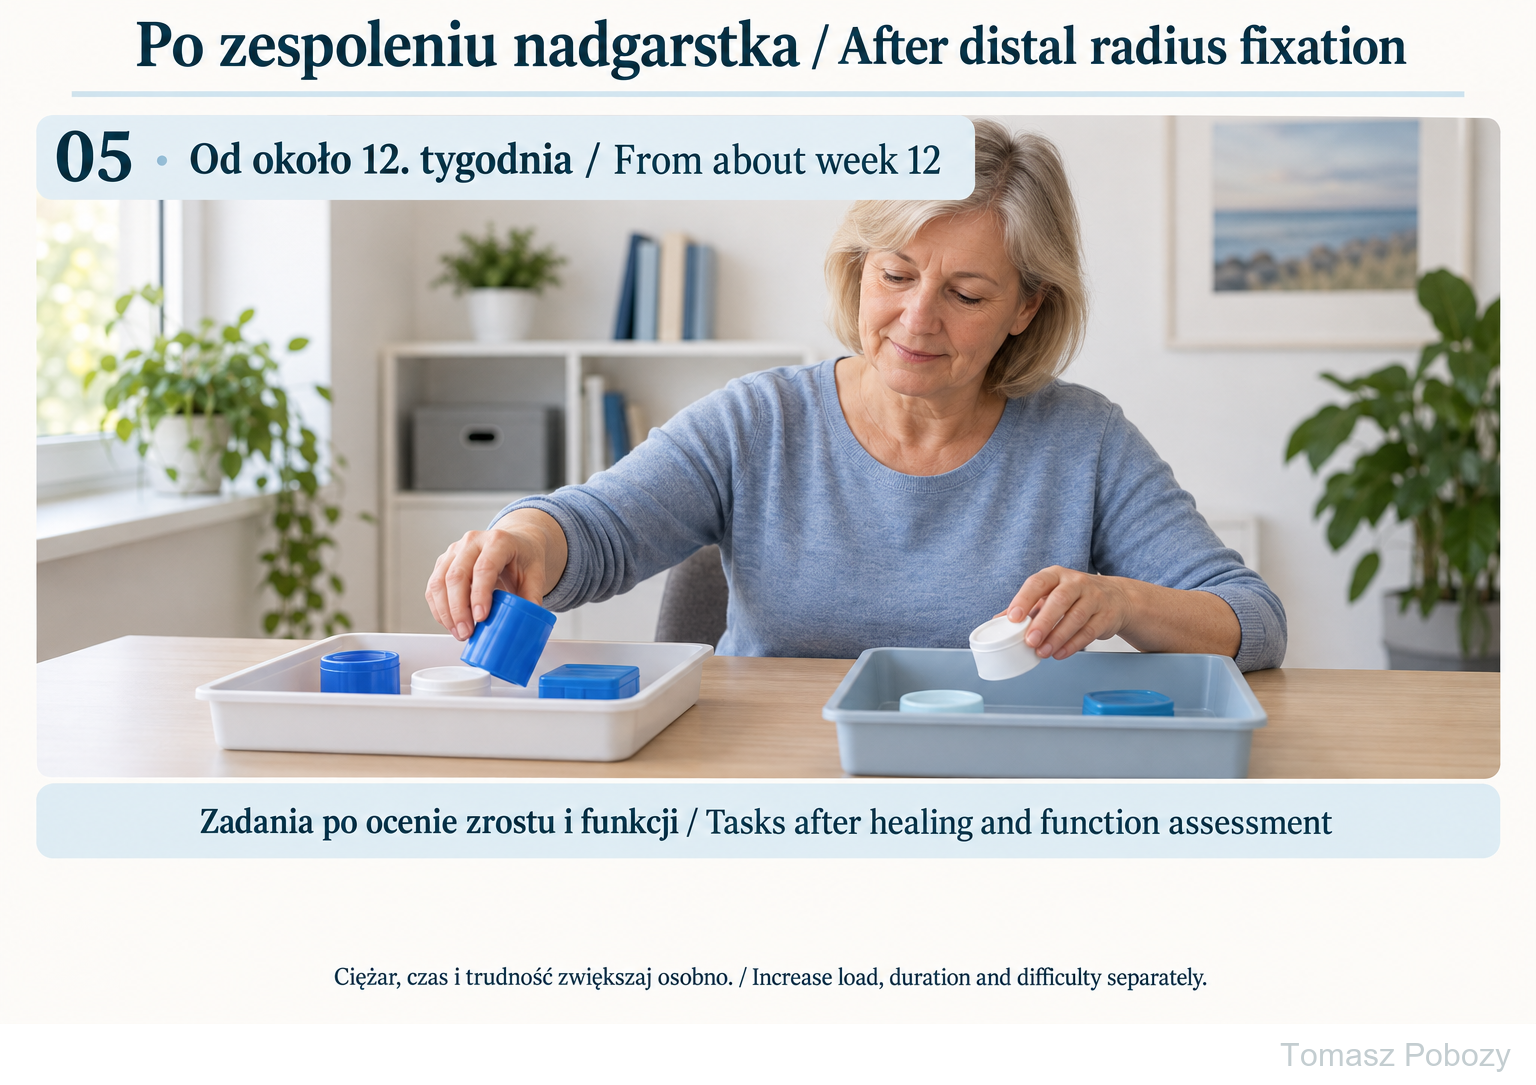
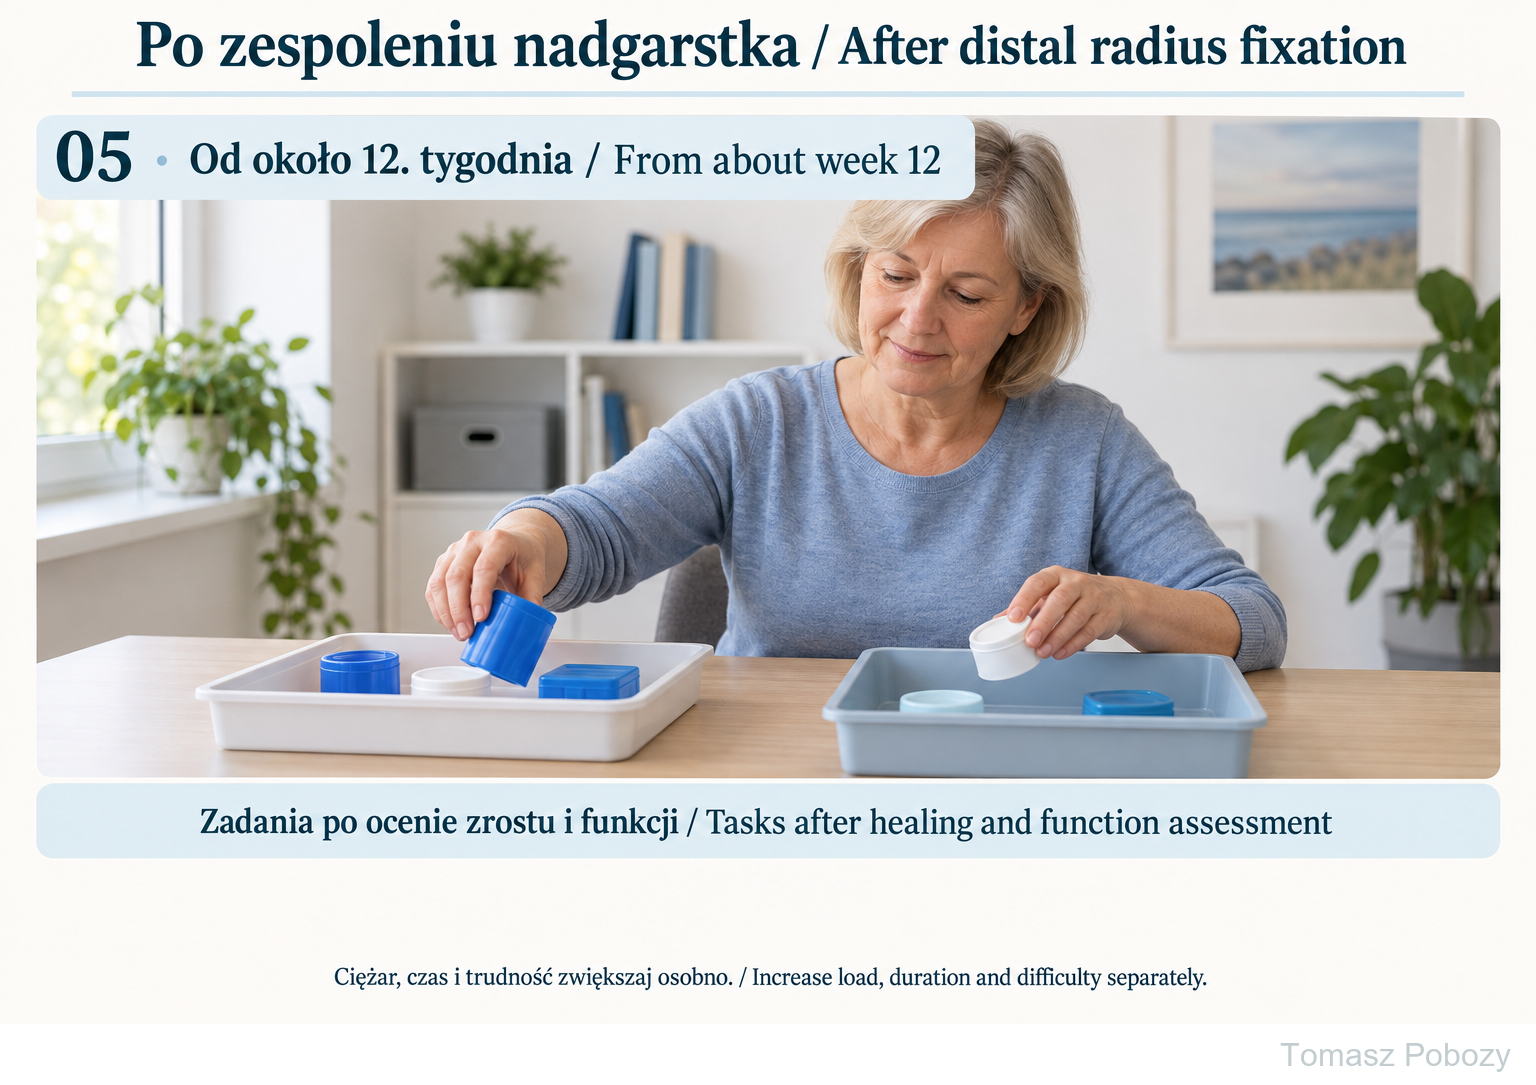
Phase 05: light tasks and object handling from around week 12 or later, after healing and function assessment. Increase load, speed and duration separately. Arm weight-bearing and heavy work require separate clearance. Phases 01–04 remain on the full original board.
Exercises — a closer look
Use the complete boards above together with the instructions for the chosen stage. An exercise shown for a later stage is not permitted early.
Open the relevant complete board and zoom in. The viewer retains all stages and captions.
Exercise instructions and progression are contained in the stage descriptions linked above.
Phase 05: light tasks and object handling from around week 12 or later, after healing and function assessment. Increase load, speed and duration separately. Arm weight-bearing and heavy work require separate clearance. Phases 01–04 remain on the full original board.
Scope and protection
Baseline assessment and operative information
Before starting, establish the fracture pattern, fixation stability, distal radioulnar joint status, associated injuries and prescribed restrictions. Record pain, swelling, sensation, finger and thumb movement and — when permitted — wrist and forearm range of motion. The Patient-Rated Wrist Evaluation (PRWE) questionnaire may be used to monitor function. Defer maximal grip-strength testing until loading is permitted. Record the dominant limb, work demands, independence and fall risk. Include a bone-health assessment after a low-energy fracture. The orthopaedic surgeon plans radiographic review; deterioration requires earlier assessment. [1–3]
Orthosis, additional repairs and a more protective pathway
Use a wrist orthosis for protection as instructed by the surgeon; establish when it may be removed for exercises and when its use may be reduced. Do not impose rigid immobilisation for 6 weeks on everyone after stable plating, but do not independently abandon prescribed protection. After triangular fibrocartilage complex (TFCC) or ligament repair, or with distal radioulnar joint instability, rotation and loading may require longer protection. New ulnar-sided wrist pain, clicking or a sense of instability require clarification before progression. This programme does not define rehabilitation for those additional repairs. [1,2]
Stages and progression criteria
01–02 · First days and early movement
01 · Protection and finger movement
From the first postoperative days
Goal: Control swelling, maintain finger movement and preserve movement of the other joints of the limb.
Actions: Support the limb at rest. Avoid prolonged dependent positioning of the hand; change position and gently move the fingers. Use prescribed pain treatment. Check that wrist protection does not cause pressure.
Exercises: With the forearm supported and wrist neutral, slowly straighten the fingers, then bend them into a loose fist with the thumb outside. Add gentle thumb-to-fingertip touches. Start with 5–10 repetitions in 3–5 short daily sessions. Maintain permitted elbow and shoulder movement without loading the operated wrist.
Protection: No forceful gripping, carrying shopping, opening jars or supporting body weight through the hand. Finger movement should not increase pain or forcibly tension tissues.
Progression and review: No deterioration in sensation or circulation, swelling controlled and finger movement improving. Wrist movement requires confirmation of the permitted range by the treating team.
02 · Active wrist movement
Usually within the first 0–2 weeks — after movement is permitted
Goal: Begin recovering mobility without overloading the fixation or soft tissues.
Actions: After stable fixation, early movement may be allowed in the first days. Postoperative instructions determine the precise start, not the calendar alone. Use the orthosis outside exercise as instructed. [1,2]
Exercises: Rest the forearm on a table with the hand beyond the edge. Slowly raise and lower the hand at the wrist within the permitted, comfortable range, keeping the forearm still. Do not pull with the other hand. For example, 5–10 repetitions in 3–5 short daily sessions; the angular range is selected individually.
Protection: Movement without external resistance. No weights, weight bearing through the hand or forceful stretching. Do not independently remove immobilisation if movement has not been permitted.
Progression and review: Correct technique without a marked increase in pain or swelling after the session or the next day. Deterioration calls for dose reduction and reassessment if symptoms persist.
03 · Rotation and light function
Approximately weeks 2–6; rotation may be permitted earlier
Goal: Gradually improve wrist and forearm movement and light daily activities.
Actions: Develop permitted movement and light self-care. Gentle assisted movement or manual treatment is introduced by the physiotherapist after assessing stability and tissues. In selected uncomplicated cases, light resisted grip may be considered from about week 2, with stable fixation, satisfactory radius–ulna alignment, no ulnar-sided pain and treating-team approval. [1]
Exercises: Sit with the upper arm beside the trunk and the elbow bent to about 90° and supported. Rotate the forearm, turning the palm up and then down. Keep the wrist straight; do not substitute moving the elbow outwards for forearm rotation. Start with 5–10 slow repetitions without a weight. Only exercise after rotation is permitted.
Protection: Do not force end range or use a hammer or weight for rotation. Light grip does not authorise heavy lifting. Ulnar-sided pain or instability rules out automatic progression.
Progression and review: Improved range and self-care without a sustained pain or swelling response. Increasing resistance depends on healing assessment and surgical review, not simply reaching 6 weeks.
04 · Gradual strengthening
Often around weeks 6–12 — after healing assessment and clearance for resistance
Goal: Rebuild grip tolerance, wrist strength and use of the limb under increasing load.
Actions: Update restrictions after examination and imaging review when indicated. Start with low resistance and short sets. Earlier light grip training in stage 03 does not replace this assessment.
Exercises: With the forearm supported and wrist straight, gently squeeze a soft sponge and release the grip fully. Example: 1 set of 5–10 repetitions followed by rest; 2–3 strengthening sessions per week. If tolerated, increase repetitions before resistance. Introduce wrist exercises with a weight, such as 0.5 kg, only after individual clearance for that load.
Protection: No maximal squeezing or sudden load increases. Introduce weight bearing through the hand separately, progressively increasing the weight transferred; push-ups and pushing off a chair with the operated hand are not starting exercises.
Progression and review: Good movement control and tolerance of the current resistance without next-day deterioration. Stop resistance and seek review for pain over the plate, tendon friction or loss of movement.
05 · Return to work and activity
From approximately week 12 or later — depending on union and function
Goal: Perform specific tasks safely, build endurance and reduce the risk of another injury.
Actions: Practise tasks relevant to work and recreation: low resistance and short duration first, then difficulty and duration. Desk work and heavy manual work do not require the same level of function.
Exercises: Select 2–3 relevant activities, such as handling light objects, carrying an authorised load close to the body and controlled tool grip. Practise in short sets with breaks. Record the load and next-day response; do not increase weight, speed and duration simultaneously.
Protection: Contact sport, fall risk, heavy work and high-load weight bearing through the hand require clearance based on union and functional assessment. Driving requires safe grip, control and emergency responses, without the effects of medicines that impair performance.
Progression and review: Healing confirmed as sufficient for the intended task, functional range, adequate strength and task tolerance without increasing pain or swelling. Full symmetry need not be achieved at week 12; persistent deficits require further rehabilitation.
Warning signs
Warning signs — stop exercise and assess the cause
Urgent help: increasing severe pain, cold or pale fingers, rapidly increasing swelling, new or worsening sensory disturbance or weakness of movement. Do not try to exercise through these symptoms. Fever, wound discharge and increasing redness require prompt medical contact. New pain or friction over the plate, painful tendon excursion, or sudden loss of active thumb/finger flexion or extension require urgent surgical review and suspension of resistance exercise. Disproportionate pain, hypersensitivity, altered skin temperature or colour, sweating and progressive stiffness may suggest complex regional pain syndrome (CRPS) and require early assessment. [4]
For a life-threatening emergency, call your local emergency number immediately — 112 in the European Union. On the boards, 112 refers to the EU.
Additional scope notes
Recovering finger, wrist and forearm movement while protecting the healing fracture. The complete illustrated guide presents the stages and exercise technique; expandable programme details follow below.
For adults after stable fixation of an acute distal radius fracture with a volar locking plate, without additional tendon or ligament repair. This programme does not apply to a wrist-spanning bridge plate, external fixation, Kirschner wires alone, corrective osteotomy or nonunion treatment. Comminuted intra-articular fractures, distal radioulnar joint instability and additional procedures require separate restrictions.
A specific case, a specific patient, a specific surgeon. Stable fixation may permit early movement, but does not mean the fracture has united. Timings are reference points; progression depends on stability, healing, examination and the response to exercise.
The doses of 5–10 repetitions, 3–5 short daily sessions and 2–3 strengthening sessions per week are practical starting suggestions, not a universal research-validated dose. The physiotherapist selects the exercises, range and load.
References
References
- Mehta SP, Karagiannopoulos C, Pepin ME et al. Distal Radius Fracture Rehabilitation. J Orthop Sports Phys Ther. 2024;54(9):CPG1–CPG78. doi:10.2519/jospt.2024.0301
- Clementsen SØ, Hammer OL, Šaltytė Benth J, Jakobsen RB, Randsborg PH. Early Mobilization and Physiotherapy Vs. Late Mobilization and Home Exercises After ORIF of Distal Radial Fractures: A Randomized Controlled Trial. JBJS Open Access. 2019;4(3):e0012. doi:10.2106/JBJS.OA.19.00012
- Kamal RN, Shapiro LM. AAOS/ASSH Clinical Practice Guideline Summary Management of Distal Radius Fractures. J Am Acad Orthop Surg. 2022;30(4):e480–e486. doi:10.5435/JAAOS-D-21-00719
- Pacchiarini L, Oldrini LM, Feltri P et al. Complications after volar plate synthesis for distal radius fractures. EFORT Open Rev. 2024;9(6):567–580. doi:10.1530/EOR-23-0188
References and links checked on 18 October 2026. Existence of a publication does not validate every dose or timetable. Institutional protocols and examples require individualisation.
Clinical commentary and terms of use
Commentary — shared surgeon–physiotherapist decisions
The phrase “fixed with a plate” is insufficient to define safe therapy. Information about fixation quality, articular fragments and soft tissues is needed. Absence of pain does not prove union, and stiffness is not an indication to force movement. The physiotherapist assesses function, teaches technique and adjusts the dose; the surgeon defines restrictions arising from surgery and healing. Information should flow in both directions. Supervision is tailored to deficits, complications and the ability to exercise independently; not everyone requires the same number of visits. If essential information is missing, retain the agreed limits and clarify uncertainties before increasing load.
The 2024 rehabilitation guideline supports early movement and allows early light grip training in selected stable, uncomplicated cases. This does not authorise weights or weight bearing through the hand in every patient. The Clementsen trial studied extra-articular fractures; its regimen should not be transferred directly to complex intra-articular injuries. American Academy of Orthopaedic Surgeons / American Society for Surgery of the Hand (AAOS/ASSH) guidance describes inconsistent evidence comparing supervised therapy with home exercise. The five-stage structure, suggested doses and functional criteria are a practical synthesis for individual application, rather than one validated protocol. [1–3]