 Skip to content
FOR CLINICIANS AND PHYSIOTHERAPISTS
Elbow instability surgery — rehabilitation protocol
Protection, movement and a gradual return to daily activity. Select the stage appropriate to the actual procedure and current clearance.
Using and loading the limb
Early phase: no lifting or body-weight support. Avoid varus stress after LCL and valgus stress after MCL procedures; additional fractures change the programme.
Full guidance ↓Brace or immobilisation
Splint, then often a hinged brace. The surgeon sets the stable arc, extension block and unlocking schedule.
Full guidance ↓Permitted movement
Flexion/extension and forearm position depend on the repaired ligaments. Do not unlock the brace independently or force extension.
Full guidance ↓Permitted movement, loading and removal of a brace are separate decisions. Additional repairs may require a more protective programme.
Rehabilitation at a glance
Progression follows healing and functional criteria, not dates alone.
Rehabilitation boards
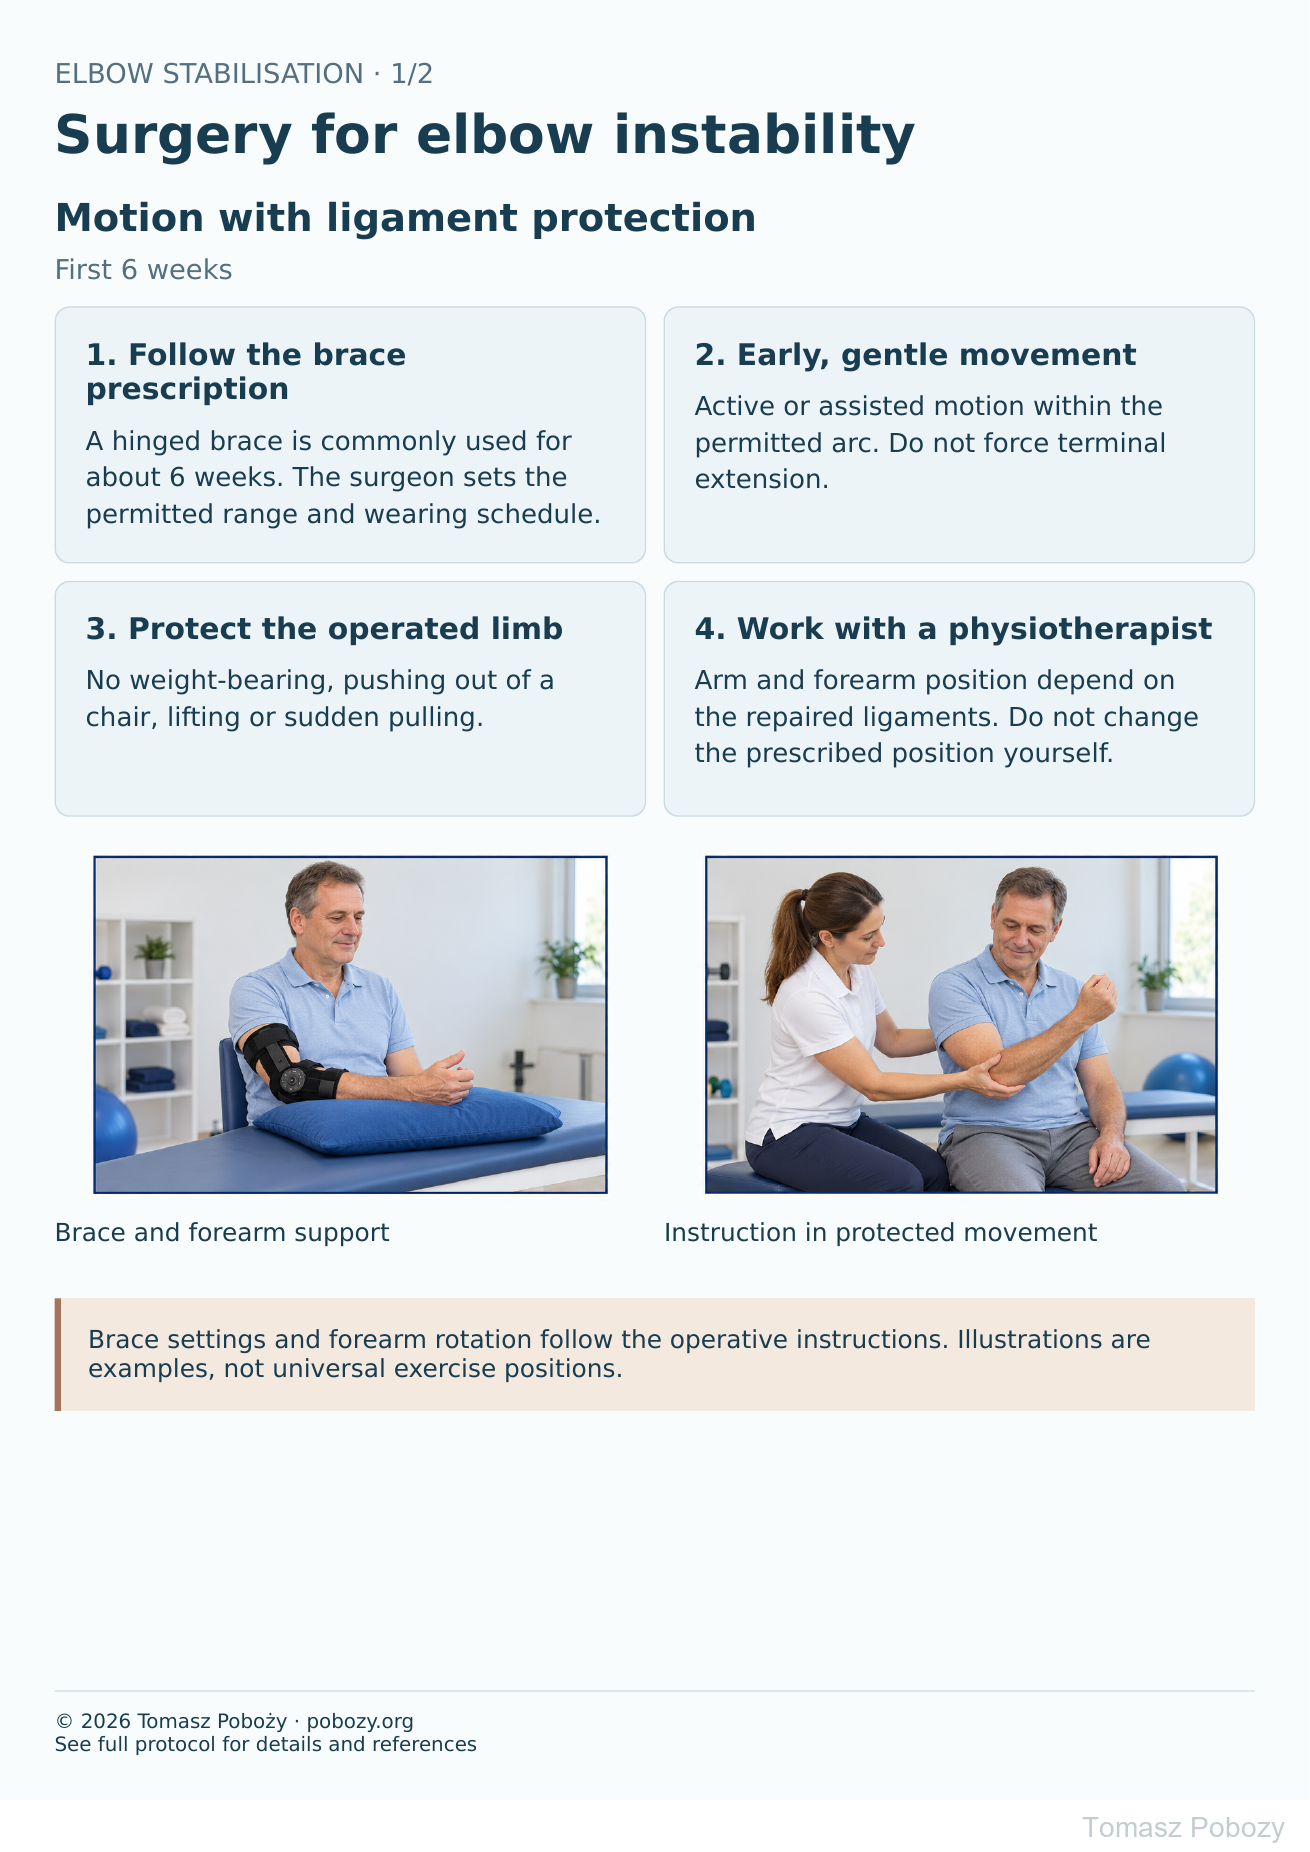
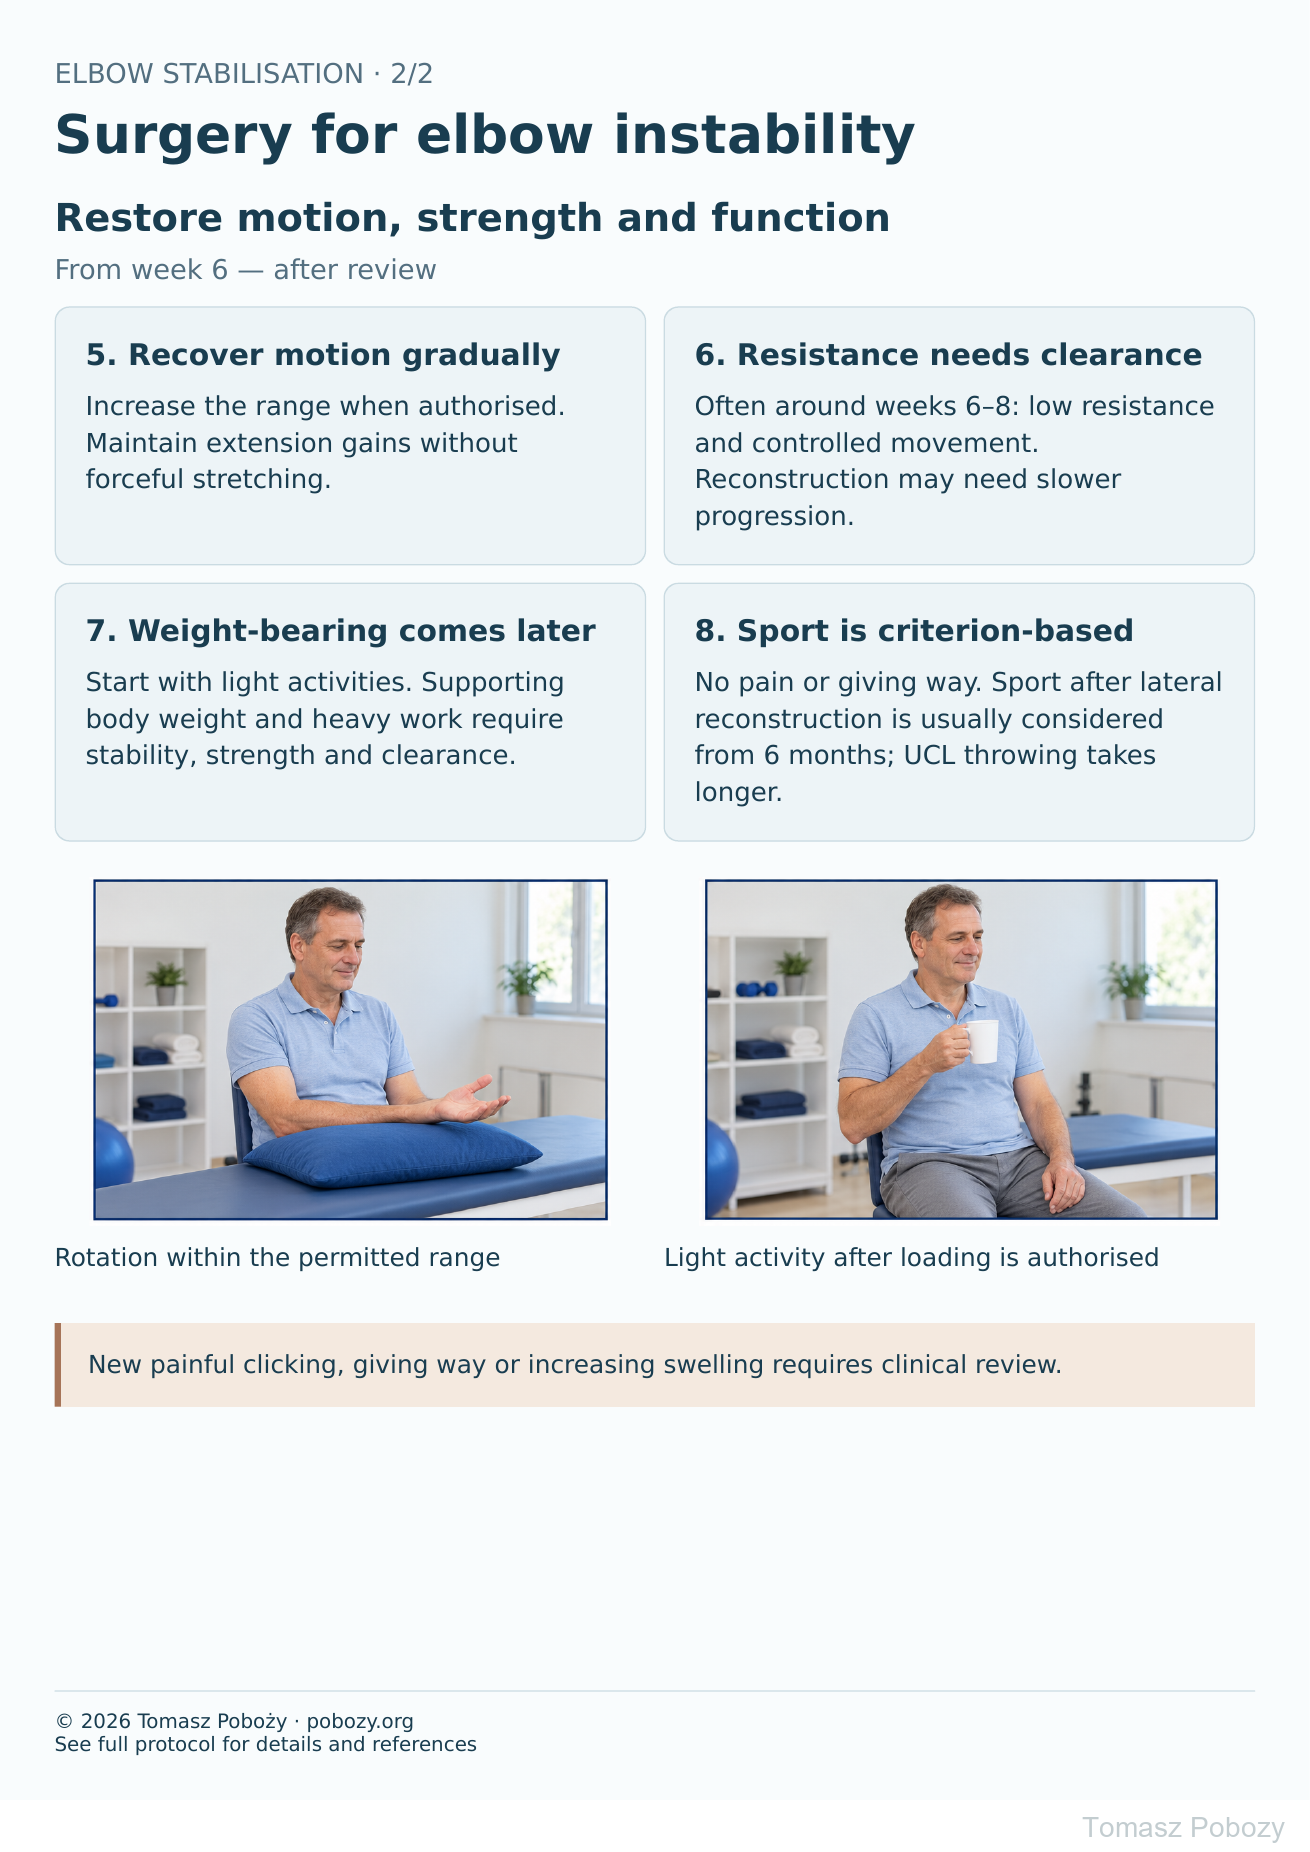
Exercises — a closer look
Use the complete boards above together with the instructions for the chosen stage. An exercise shown for a later stage is not permitted early.
Open the relevant complete board and zoom in. The viewer retains all stages and captions.
Exercise instructions and progression are contained in the stage descriptions linked above.
Scope and protection
1. Information needed before rehabilitation
Establish: repair or reconstruction; lateral LCL/LUCL, medial MCL/UCL or both; suture-tape augmentation; bone procedures and ulnar nerve surgery. The orthopaedic surgeon should document the stable motion arc, permitted forearm rotation, brace settings and loading schedule. Obtain missing instructions before progressing. [1],[2]
2. Protection depends on the repaired ligaments
LCL/LUCL — lateral side: avoid varus stress, unsupported shoulder abduction and combined elbow extension with supination. Pronation or neutral rotation is often selected according to intraoperative stability. Forearm rotation is commonly performed with the elbow flexed about 90°. [2],[3]
MCL/UCL — medial side: avoid valgus stress and throwing. Supination may improve stability in an isolated MCL-deficient elbow, but biomechanical findings do not establish a universal position after every reconstruction. Following repair of both sides, the surgeon determines positioning. [4]
Stages and progression criteria
3. First days and weeks 0–2
Initial protection uses a splint or brace, usually followed by a hinged brace. A sling may improve comfort but does not replace prescribed protection. Begin elbow motion when stability and the wound permit, often within the first days or following review in the first or second week. [1],[3]
Monitor swelling, wound healing, finger sensation and movement. Move the hand and wrist if associated procedures allow. The physiotherapist prescribes short, frequent sessions of active or assisted motion without forcing the painful endpoint. No lifting or supporting body weight.
4. Weeks 2–6 — expanding the protected arc
Regular physiotherapy and home exercises help prevent contracture. Monitor extension in particular while respecting the temporary extension block. Do not unlock the brace yourself.
Published protocols include initial extension blocks of about 30–60°, gradually approaching full extension around week 6. These are examples, not a compulsory schedule. Flexion must also remain within the stable arc. [2],[3]
Avoid forceful stretching, hanging, push-ups and self-testing of stability. If exercises cause a clear increase in pain, swelling or stiffness persisting the following day, reduce the dose and review the programme.
5. Weeks 6–12 — restoring function and strength
Once healing and stability are confirmed, wean from the brace as instructed. Introduce light daily tasks and low-resistance exercise, often around weeks 6–8. Train the elbow, forearm, grip and scapular control while avoiding stresses that compromise the repaired ligaments. [2],[3]
There is no single safe kilogram limit for every repair. Tendon-graft reconstruction and associated procedures may need slower progression. Weight-bearing requires separate clearance; after isolated lateral reconstruction, it is usually introduced no earlier than approximately weeks 10–12. [2]
6. After 3 months — work and sport
Increase endurance and task-specific loading gradually. Progression requires healed tissues, functional pain-free motion, no swelling or instability, adequate strength and movement control. Time alone does not establish readiness.
Sport after LUCL reconstruction is usually considered from about 6 months. Following UCL reconstruction in throwing athletes, unrestricted competition often takes approximately 12–14 months, preceded by a separate interval throwing programme. [2],[5]
Suture-tape-augmented repair may follow a faster schedule than reconstruction, but it does not justify accelerating rehabilitation without authorisation. [6]
Daily activities and follow-up
Daily activities follow the permitted joint motion, lifting, grip and arm support for your procedure. Ending immobilisation is not clearance for lifting or driving. The detailed guidance below explains the criteria and exceptions.
Warning signs
7. Warning signs and follow-up
Urgent assessment is needed for a new deformity or suspected dislocation, a cold or pale hand, or increasing finger numbness or weakness. Contact the surgeon for fever, wound discharge, increasing redness, sudden severe pain or painful clicking with giving way. Do not attempt to reduce the elbow yourself.
The first review is commonly within 1–2 weeks, with further checks before changing protection or increasing loads. Bone procedures also require assessment of bony healing.
For a life-threatening emergency, call your local emergency number immediately — 112 in the European Union. On the boards, 112 refers to the EU.
Additional scope notes
The goal is a stable, functional elbow while preventing persistent stiffness. Begin movement early within the range that protects the repair. Physiotherapy instruction and supervision guide the gradual restoration of motion and loading.
References
References
- AAOS. Recurrent and Chronic Elbow Instability. OrthoInfo.
- Ohio State University Wexner Medical Center. Lateral Ulnar Collateral Ligament Reconstruction. 2023.
- Verstuyft L, Caekebeke P, van Riet R. Postoperative rehabilitation in elbow surgery. J Clin Orthop Trauma. 2021;20:101479.
- Armstrong AD, et al. Rehabilitation of the medial collateral ligament-deficient elbow: an in vitro biomechanical study. J Hand Surg Am. 2000;25(6):1051–1057.
- Hospital for Special Surgery. UCL Tear (Tommy John Injury).
- Wilk KE, et al. Repair of the Ulnar Collateral Ligament of the Elbow: Rehabilitation Following Internal Brace Surgery. J Orthop Sports Phys Ther. 2019;49(4):253–261.
References and links checked on 18 October 2026. Existence of a publication does not validate every dose or timetable. Institutional protocols and examples require individualisation.
Clinical commentary and terms of use
8. Clinical commentary
Preventing stiffness and protecting ligament healing must proceed together. Prioritise regular, well-controlled motion within a stable arc. Early recovery of full extension must not stretch the repair. Increasing loss of motion calls for timely assessment rather than greater stretching force.